Data Binding in LWC – Types, Two-way Binding & Best Practices
Data binding is one of the most fundamental concepts in Lightning Web Components (LWC). It allows seamless data flow between your components’ JavaScript code and HTML template. In simple terms it keeps View (UI) and Modal (Component logic) in sync.
What is Data Binding in LWC?
Data Binding is the process of connecting the components’ JavaScript (JS) properties to the HTML template so that any changes in data automatically updates UI and vice versa (in case of two-way databinding).
It helps to create reactive and interactive components where UI automatically reflects the latest state of data.
Types of Data Binding in LWC
There are mainly two types of data binding in LWC:
- One-way Data Binding
- Two-way Data Binding
Let’s understand each in detail with examples.
One-way Data Binding
In LWC, one-way data binding is the default behavior. In template, we can access property value directly if it is primitive or object. Dot notation (.) is used to access property from an object.
Example
<template>
    <lightning-card title="Data Binding">
        <p class="slds-p-horizontal_small">
            Hello {userName} !!
        </p>
    </lightning-card>
</template>
import { LightningElement } from 'lwc';
export default class DataBindingInLWC extends LightningElement {
    userName = "John";
}
Output
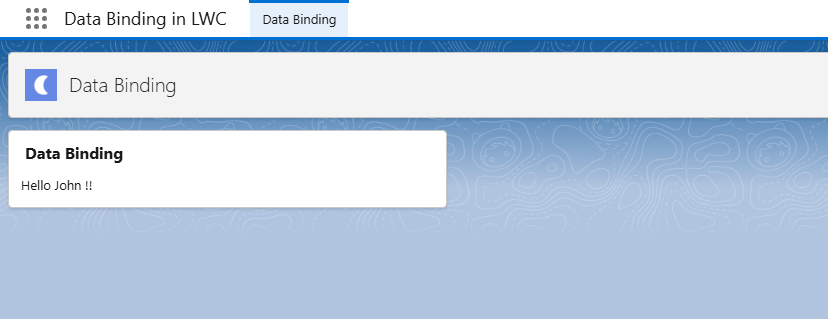
If value of userName changes in JS. It automatically updates in UI.
import { LightningElement } from 'lwc';
export default class DataBindingInLWC extends LightningElement {
    connectedCallback() {
        setTimeout(() => {
            this.userName = "Paul";
        }, 6000)
    }
    userName = "John";
}
Output of above snippet will be Hello John !! for initial 6 seconds then, component will re render and display Hello Paul !!
Two-way Data Binding
LWC does not have native two-way binding. Instead, we need to achieve it using event handling and property binding.
<template>
    <lightning-card title="Data Binding">
        <div class="slds-p-around_medium">
            <lightning-input label="Enter your city" value={city} onchange={onCityChangeHandler}></lightning-input>
            <p class="slds-p-around-small">
                I live in {city}.
            </p>
        </div>
    </lightning-card>
</template>
import { LightningElement } from 'lwc';
export default class DataBindingInLWC extends LightningElement {
    city = '';
    onCityChangeHandler(event){
        this.city = event.target.value;
    }
}
Output
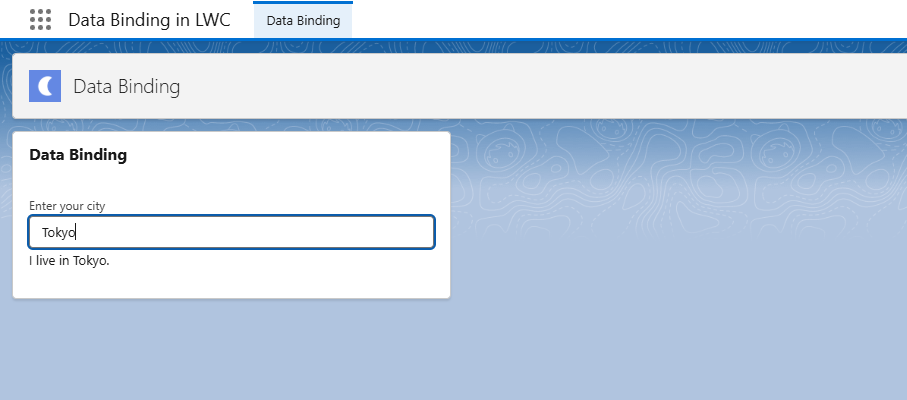
{city} fetches value from JavaScript controller to HTML template and onchange={onCityChangeHandler} helps to pass data entered in input box to JavaScript controller. Together they simulate two-way data binding effectively.
How to use getters in LWC for Data Binding?
A getter is a special JavaScript method that behaves like a property. When template tries to access it, the getter runs automatically and returns a value.
LWC does not allow computed or derived expressions such as Names[2] or {2 * 2} in template. Therefore, we use getters to derive data from existing properties.
<template>
    <lightning-card title="Get name in uppercase">
        <div class="slds-p-around_medium">
            <lightning-input label="Enter your name" value={name} onchange={onNameChangeHandler}></lightning-input>
            <p class="slds-p-around-small">
                {getName}
            </p>
        </div>
    </lightning-card>
</template>
import { LightningElement } from 'lwc';
export default class DataBindingInLWC extends LightningElement {
    name = '';
    onNameChangeHandler(event){
        this.name = event.target.value;
    }

    get getName(){
        return "Hello " + this.name.toUpperCase();
    }
}
Output
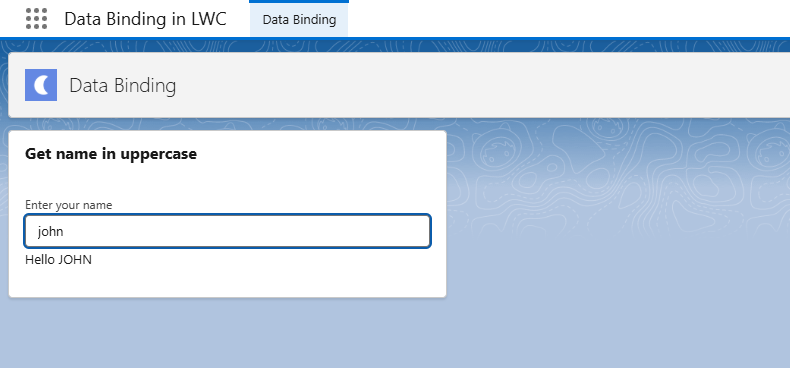
Here, {getName} will run get getName() function. Every time user enters any value in input text box it will call onchange handler method which will assign entered text to name property.
How to use @track decorator in LWC for Data Binding?
By default, LWC only tracks changes to property references, not the internal values. This means, LWC is able to track values of primitive nature that are directly assign to property ex. this.title = "Salesforce Developer" this will track by default.
When property is of type array or object there is a limit to the depth of changes that are tracked. So, when you mutate an object or array directly, the UI doesn’t update. Therefore, @track decorator in LWC is used to make an object’s or array’s internal properties reactive.
Without @track decorator
<template>
    <lightning-card title="Data Binding">
        <div class="slds-p-around_medium">
            <lightning-input label="Enter your roll number" onchange={onChangeHandler}></lightning-input>
            <p class="slds-p-around-small">
                {student.rollNumber}
            </p>
        </div>
    </lightning-card>
</template>
import { LightningElement } from 'lwc';
export default class DataBindingInLWC extends LightningElement {
    student = {
        "name": "John Doe",
        "rollNumber": 20820176
    }
    onChangeHandler(event){
        this.student.rollNumber = event.target.value;
    }
}
Output
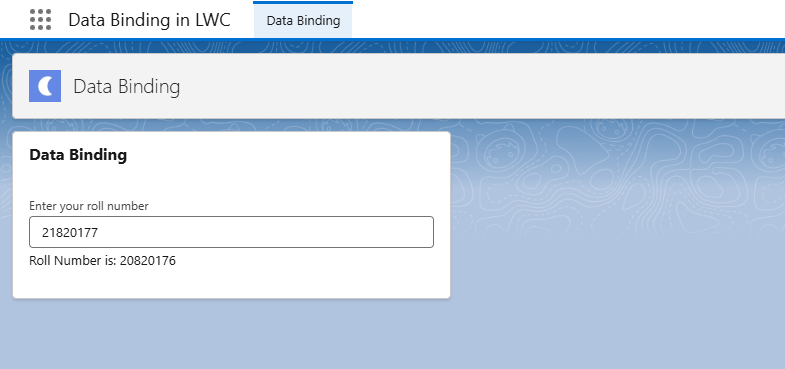
As a result of above example roll number will update in the controller but won’t reflect on UI (Displaying stale data on UI). Therefore, need to decorate student property with @track
With @track
import { LightningElement,track } from 'lwc';
export default class DataBindingInLWC extends LightningElement {
    @track
    student = {
        "name": "John Doe",
        "rollNumber": 20820176
    }
    onChangeHandler(event){
        this.student = {...this.student, "rollNumber":event.target.value};
    }
}
Assigning value to original object property ( this.student.rollNumber = event.target.value ) is not a good coding practice. Therefore, we have created a shallow copy of it ( this.student = {…this.student, "rollNumber":event.target.value} ) and then updated the rollNumber. Please refer spread operator blog.
Output
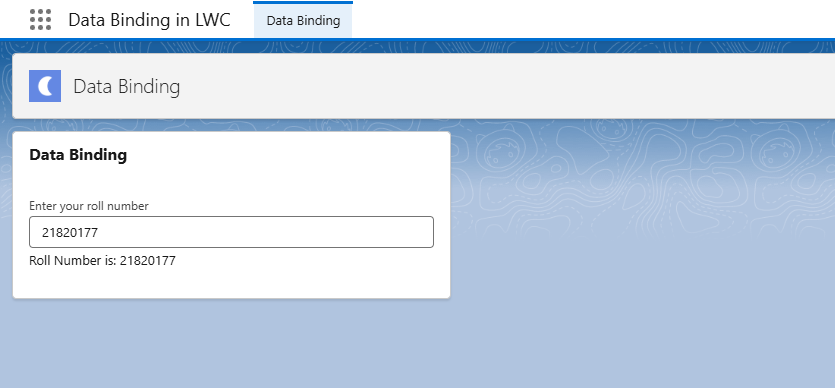
When we enter a roll number in textbox it will update property of student object and same will reflect on UI due to use of @track decorator.
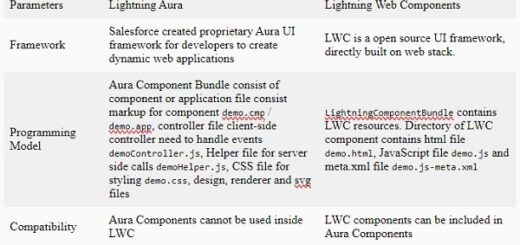
Difference Between Lightning Aura and Lightning Web Component Data Binding
| Features | Aura Components | Lightning Web Components |
| Syntax | {!v.property} | {property} |
| Reactivity | Automatically handled by Aura | Managed explicitly in LWC |
| Two-way support | Built-in cmp.get("v.property") to access the value of property in controller or helpercmp.set("v.property","abc") to set the value of property and display on UI. | Simulated via event handling |
| Performance | Heavier, slow rendering | Faster, modern reactive engine |
| Development Style | Verbose | More JavaScript driven and modular |
Best Practices of Data Binding
- Avoid adding spaces around properties.
- Avoid unnecessary bindings. Overbinding can cause unnecessary DOM rerenders.
- Use getters for computed values. It will make your template cleaner and efficient.
- Implement debouncing for frequent inputs to improve performance.
- Make judicious use of
@trackdecorator.
Data binding lies at core of LWC. While Aura components allowed direct two-way binding, LWC’s unidirectional data flow is more performant and scalable. Mastering data binding will help you to move confidently into deeper LWC concepts such as:
- Parent-child communication
- Lightning Messaging Service
- Apex wire adapters
- Lightning Data Service.